I'm bringing this post to the top as I have added several tutorial links. My next flower should be the Victorian rose and the buttercream rose (worth the wait). I will be adding more flowers to this Index in the coming weeks. I hope you enjoy working with these flowers.
In the following posts I will show you techniques for making the following flowers with Royal Icing. Please be patient as I will be updating this index with instruction in the following post. For future reference, use this as a name guide and Index to step-by-step instructions.
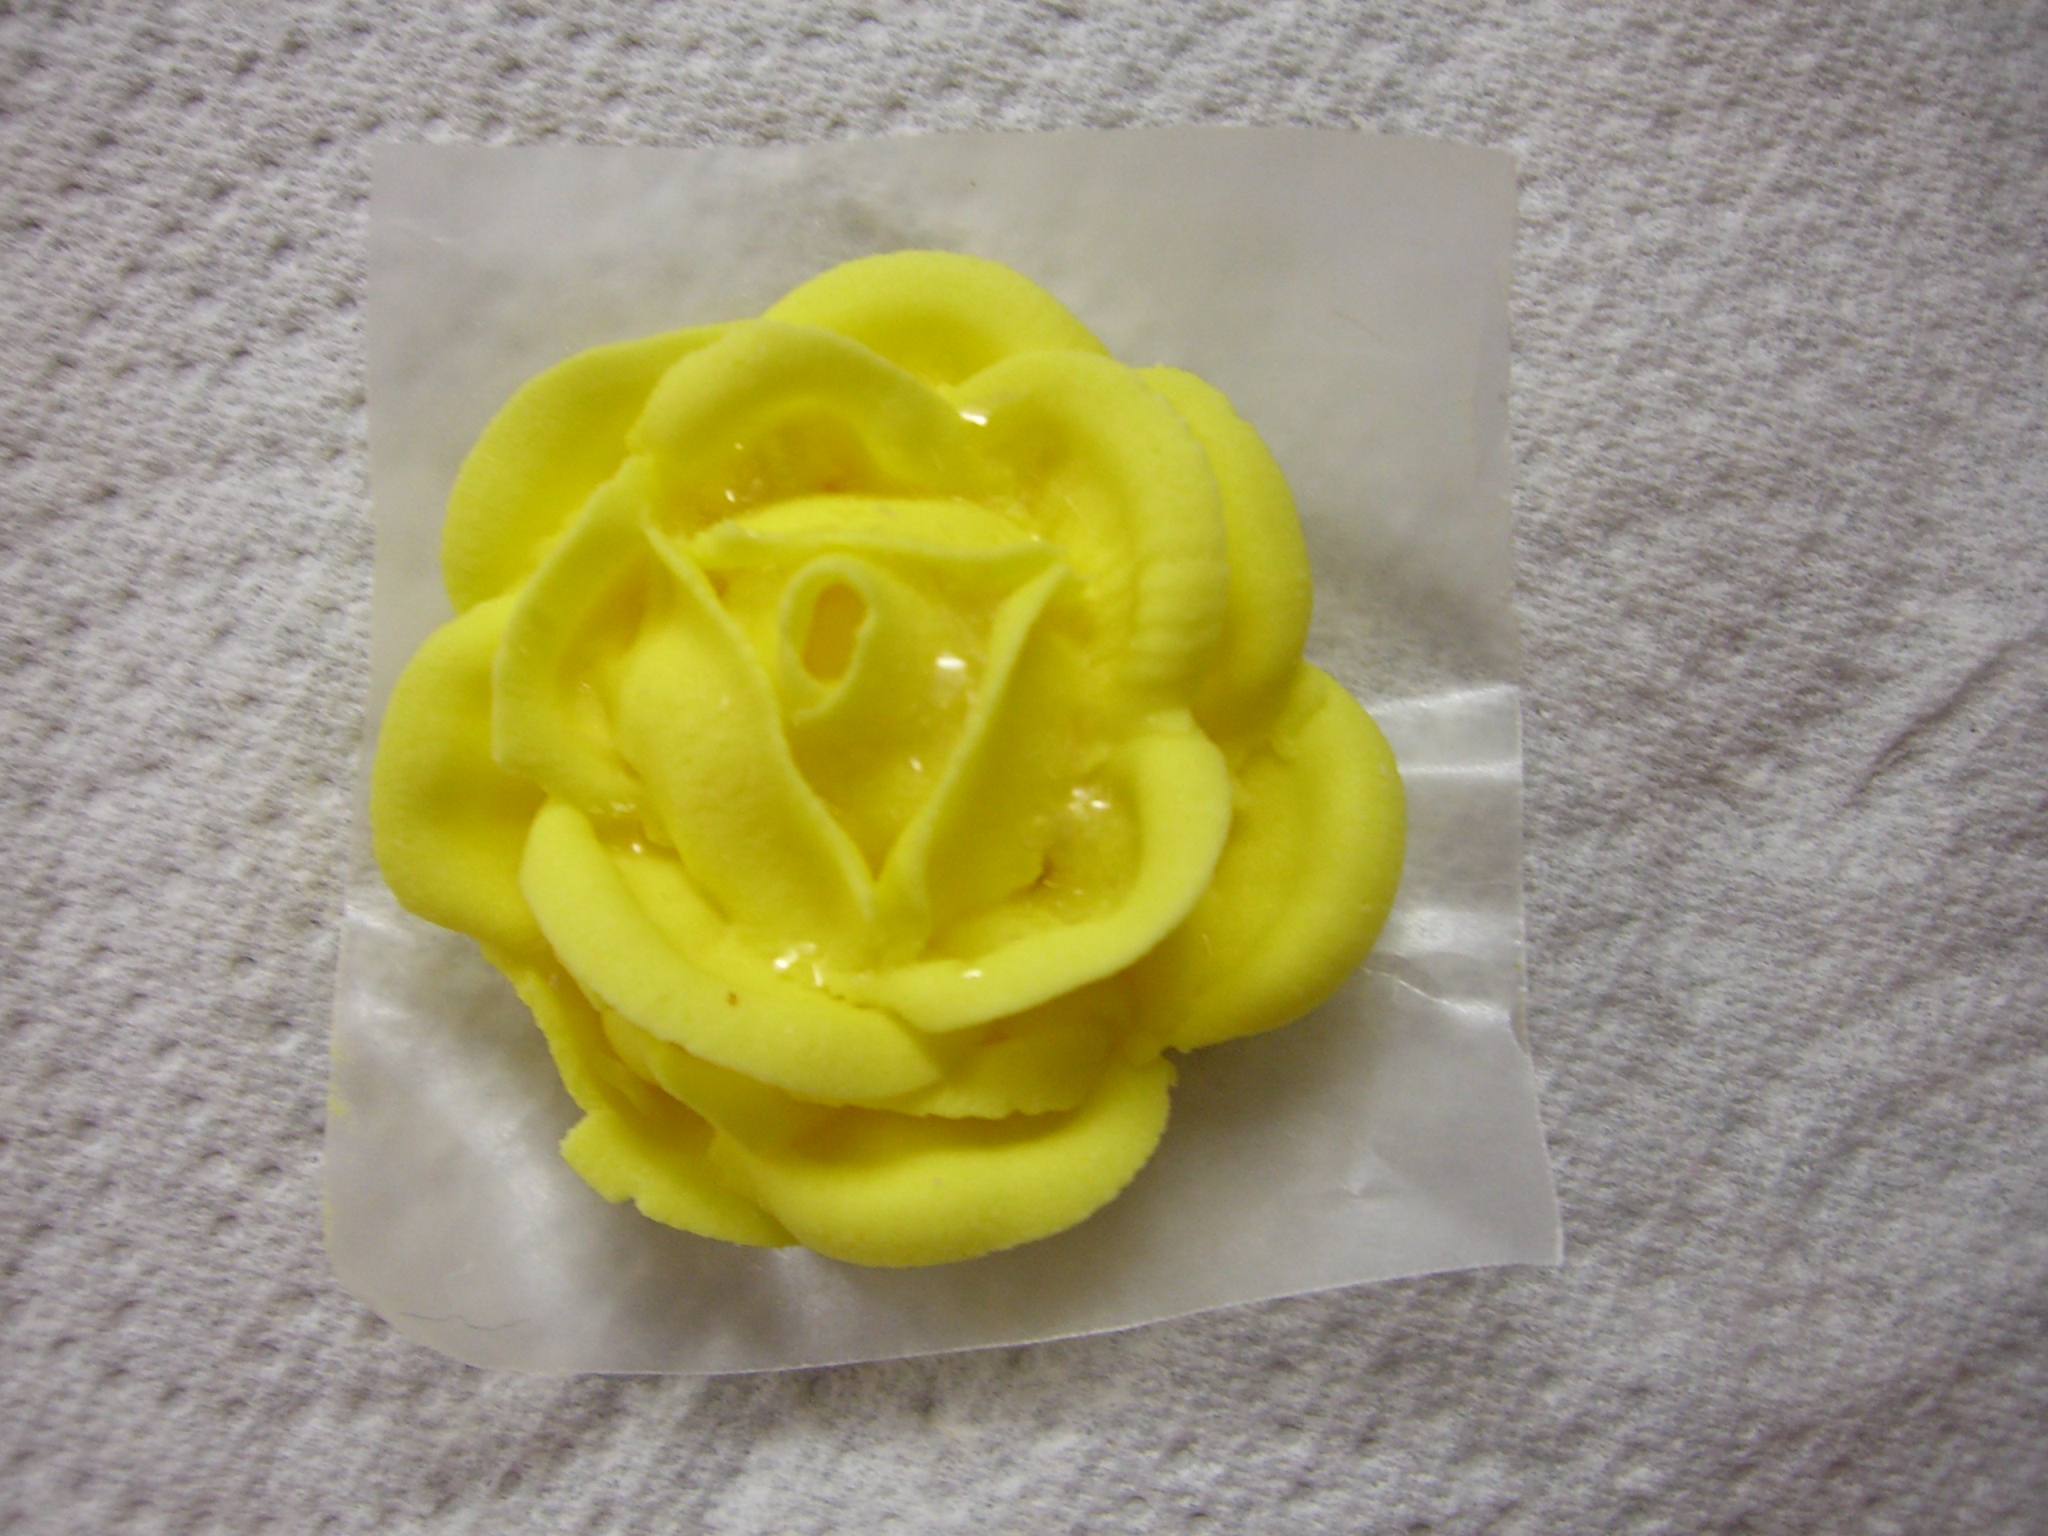
Victorian roses
Daisies
Click HERE for daisy flower step-by-step instructions.
Pansies
Click HERE for Pansy flower step-by-step instructions.
Chrysanthemum
Click HERE for Chrysanthemum flower step-by-step instructions.
Primrose
Click HERE for Primrose flower step-by-step instructions.
Violet and violet leaf
Click HERE for violet flower step-by-step instructions.
Click HERE for violet leaf step-by-step instructions.
Apple Blossom
(bright pink flower on lower left corner)
Click HERE for apple blosssom step-by-step instructions
Daffodils
Click HERE for Daffodil flower step-by-step instructions.
Saturday, May 24, 2008
Icing Flowers (Royal Icing)
Posted by
The Cake Stylist
at
2:00 AM
11
comments
![]()
Labels: Edible Flower Index, Edible Flowers, Royal Icing
Royal Icing: Primrose
The primrose flower is a medium sized flower with heart shaped petals. You can find these flowers in different colors, including all yellow, blue with yellow centers and purple with yellow centers. These flowers are accent flowers that add a touch of elegance to any cake. Refer to the Flower Index for other flower's step-by-step instructions.
Primrose Flower
Tip: 103, 14, 1
Royal Icing: Pink (or color of choice)
Consistency: Medium
Royal Icing Recipe
Instructions
1. Looking down on your flower nail, imagine dividing the nail as follows: Note that the flower should be the size of the inner circle. 2. Using your tip 103 make the first hert shaped petal (depicted at the upper left corner of picture below) by sqeezing your piping bag slightly at a 45 degree angle from center to circle edge. At this point continue piping along the edge while gently using a gentle back and forth motion in the middle as you spin your flower nail slowly and proceeding to close the petal. Relax pressure, stop and slide out.
 3. Repeat to make four more heart shaped petals (for a total of five).
4. Add a small star center with tip 14.
 5. Add a small dot to the top of the star with Tip 1.
6. Dry in medium flower former.
*Picture of cake with this flower
Posted by
The Cake Stylist
at
12:37 AM
0
comments
![]()
Labels: Edible Flowers, Royal Icing, Tutorials
Royal Icing: Pansy
Pansies are one of my favorite royal icing flowers because they look so complicated, but they are not. If you have tried the other flower tutorials I have previously posted, then trying this flower out should not be difficult. Pansies are found in nature in different colors, including all yellow or all dark blue. Add color by painting over them when dry or using color striped bag. Refer to the Flower Index for more flower instructions.
Pansy Flower
Tip: 104, 1
Royal Icing: yellow and violet (or color of choice)
Consistency: Medium Consistency
Royal Icing Recipe
Instructions:
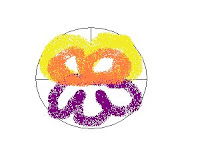
1. Looking down on your flower nail, imagine dividing the nail as follows. The flowers will be the size of the whole circle.
 2. Using your tip 104 make the first yellow petal (one quarter of the circle). Squeeze bag lightly at 45 degree angle, to make and upside down U (as shown on picture below). Make sure that the U closes at the end – relax pressure, unite with the starting point, stop and slide out. Repeat to form the second yellow petal (second quarter of the circle).
 3. No let's make the violet petal. This is basically a single ruffled petal that will fill one half of the circle. Create this petal by starting like a single petal, but don't finish it. Instead, use a gentle back and forth motion to create a ruffled effect.
4. Add two shorter petals on top of the first two yellow petals (depicted in picture below in orange for visibility), positioned so that they are centered over the seams where the yellow petal meet with the single ruffled violet petal. 5. Add a tip 1 teardrop shaped loop center in yellow color (as shown in picture below).
 6. Dry in medium Flower Former.
7. When dry, dip a small brush in food coloring (violet in this case) and add violet stipes to top yellow flowers. *Picture of cake that depicts this flower.
Posted by
The Cake Stylist
at
12:14 AM
0
comments
![]()
Labels: Edible Flowers, Royal Icing, Tutorials
Sunday, November 4, 2007
Royal Icing: Daffodil
Daffodil

I have moved to a difficult flower, however, the difficulty only lies in the several steps that it takes to create the flower and not the handling of the piping bag.
- Tip: 104, 3 and 1
Royal Icing: One color - yellow
Consistency: medium

Petal depicted in orange for visibility. Space in the middle will not be there, but marked as seen to trace the movement of the tip.
 3. Repeat to make a total of 6 petals.
  4. Dip your fingers in cornstarch and pinch outside of each petals to make them pointy
 Flower Center
1. Start by making a flat dot at the center of the dot with tip 3. Then move in a circular motion to create a coil that opens up (like a tornado shape) – base should be narrower than the top. Stop and lift away.
Center depicted in black to show tip movement. Spiral on top like a coil.
 2. With tip 1 bag, add a zigzag trim to the top edge of the coil.
Trim depicte in pink for visibility. Double click to enlarge.
 3. Dry in small flower former to give a slight cupped shape to flower
Posted by
The Cake Stylist
at
7:40 PM
1 comments
![]()
Labels: Edible Flowers, Royal Icing, Tutorials
Royal Icing: Daisy
Daisy
Refer to Flower Index for other flower links.
Materials
- Tip: 104 and 5 Royal Icing: two colors- Petals (white) and yellow center (LINK
Although daisies are found in anture with white petals and yellow centers, it is fun to make them in any color you want in order to march the theme of your cake.
Instructions
1. Prepare your flower nail with a square of wax paper (glue it with a little icing). Looking down on your flower nail, imagine dividing the nail in 12 parts as follows:

2. Position your bag with tip 104 parallel to head of your nail. Wide end close to outer edge and narrow edge angled up slightly. Squeeze slightly and slide tip towards center. Voila, your first petal. Do the north, west, east and south petals.

3. Repeat for total of 12 petals.

4. Add center with tip 5, by making a dot and then pressing with your fingers lightly (depicted in orange for visibility)

5. Dry in medium flower former to give shape to flower.

Flowers in Flower Former:

Posted by
The Cake Stylist
at
2:50 PM
1 comments
![]()
Labels: Edible Flowers, Royal Icing, Tutorials
Tuesday, October 23, 2007
Royal Icing: Violet Leaves
Violet leafs add a pleasant full look to cakes. Since violet flowers are too small, I like placing them under the flower to bring out its details. Refer to Flower Index for other flower links.
- Tip: 103
- Royal Icing: Green (one color
- Consistency: medium
- Royal Icing Recipe
- Looking down on your flower nail, imagine dividing the nail in half; Then in two quarters.
- Squeeze royal icing on one quarter of the nail slightly. Go up by using a jiggling or zig zag motion (another way to describe it is to do multiple ‘n’ letters
- When you reach the top slide tip out a little bit and ‘fan’ the royal icing as you turn the nail.
- Continue down the path (second quarter) in a jiggling motion moving back to starting point.
- Dry in medium flower former to give a slight cupped shape to leaf.

Link to how to make Violet Flowers (flower shown above)
Posted by
The Cake Stylist
at
1:36 PM
0
comments
![]()
Labels: Edible Flowers, Royal Icing, Tutorials
Royal Icing: Violet Flower
Violets add a lot of color to cakes. You can make them any color you want to match the theme of your cake. These can be used as filler or as the main flower theme. Refer to the Flower Index for other flower links.
VIOLET FLOWER
- Tip: 59 and 1
- Royal Icing: two colors- Petals (violet, white or pink) and yellow center
- Consistency: medium
- Royal Icing Recipe
INSTRUCTIONS:
- Looking down on your flower nail, imagine dividing the nail as follows:
Note that the flower should be the size of the inner circle
- Using your tip 101 make the first bottom petal (violet, white or pink royal icing). Squeeze bag lightly at 45 degree angle, to make and upside down U (depicted on the upper left corner of picture below). Make sure that the U closes at the end – relax pressure, unite with the starting point, stop and slide out.
- Repeat to make two more bottom petals.
- Make two shorter rounded top petals
- Add two center dots with yellow royal icing (tip 1).
- Dry in small flower former to give a slight cupped shape to flower.

Posted by
The Cake Stylist
at
1:18 PM
0
comments
![]()
Labels: Edible Flowers, Royal Icing, Tutorials
Royal Icing: Apple Blossom
By popular demand, I am starting a series of post with step-by-step instructions (Refer to Flower Index for links to other flowers). Royal icing flowers are beautiful and the end result will leave you deeply satisfied. They embellish everythig: cakes, cupcakes and even cookies. I would like to mention that making these flowers may be difficult at the beginning, but the skills are not difficult to acquire. Lets start with easy ones and move on to more difficult ones.
Apple Blossom
- Tip: 101 and 1
- Royal Icing: two colors - pink or white; and yellow
- Consistency: Medium
- Royal Icing Recipe
NOTE: These flowers are often used as filler flowers. Try them on simple cupcakes to embellish them.
Instructions:
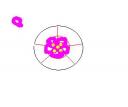
1. Looking down on your flower nail, imagine dividing the nail in 5 equal parts.

*Note that the flower should be the size of the inner circle.

3. Prepare bag with tip 1 and fill with yellow royal icing. Add one dot in the center and four more on the outside as seen below.

4. Dry in small flower former to give a slight cupped shape to flower. Apple blossom is bright pink flower on lower left corner.

Link to Cake Picture with these flowers.
Posted by
The Cake Stylist
at
12:27 PM
0
comments
![]()
Labels: Edible Flowers, Royal Icing, Tutorials
Monday, October 1, 2007
Royal Icing Recipe
By popular demand, here is the Royal Icing recipe by Wilton.
Stiff Consistency (Yields 3 cups)
Ingredients:
3 level tablespoons of Meringue Powder
1 lb. sifted pure cane confectioners' sugar
5-6 tablespoons lukewarm water
**Make sure all your utensils are grease free. Tip: boil egg beaters to remove grease.**
- Place confectioners sugar on a large bowl and add the meringue powder. Mix at low speed until blended.
- Add water and mix for about 8 minutes at low-medium speed until the icing looses its sheen (if you have been mixing for 8 minutes and the icing still has some sheen, don't worry about it, your icing is done).
- To prevent drying cover the bowl of icing with a damp cloth while you are working with it.
Stiff, Medium or Thin Consistency:
Stiff consistency- See recipe above
Medium consistency- Add a teaspoon of water per cup of icing above
Thin consistency- Add two teaspoons of water per each cup of stiff consistency. One teaspoon of water or milk per each cup of medium consistency icing.
To read more about icing cosistency, read buttercream consistency here which applies to Royal Icing.
Store in airtight container for up to two weeks. If you want to use it after a while, notice the the icing top layer has dried a little bit. Just mix in low speed to restore original texture. Sometimes you might need to add some water.
Posted by
The Cake Stylist
at
2:16 PM
0
comments
![]()
Labels: Icing, Recipes, Royal Icing


