In order to fill outlines you need to thin the color flow icing. To do so you must add water until you are able to spoon out a small amount of icing and let it drop back into the bowl. Then do the 10 second rule: when it takes a full count of 10 for the icing to sink back into the mixture and disappear completely, the icing is ready.
Other recipes will tell you to add the water with few drops at a time. Please do that because it is easier to fix a not very thinned icing than to fix a very thinned icing. I usually start with 2 teaspoons for a whole recipe then continue with few drops at a time.
Links to:
Color Flow Icing Recipe
Color Flow Icing Technique: How to decorate your cookies
Cookie Recipe and step-by-step instructions
Royal Icing as Color Flow: Coming Soon
Thursday, October 4, 2007
Thinning Color Flow Icing

Color Flow Icing Recipe : Cookie Decoration
Full strength consistency. Yields 1 3/4 cup
1 lb sifted pure cane confectioners' sugar (4 cups)
2 tablespoons Color Flow Icing Mix ( I use WILTON Color Flow Mix
1/4 cup plus 1 teaspoon water.
Make sure all utensils are grease free. ** Tip: boil egg beaters to remove grease. **
- Mix all ingredients starting at slow speed (stay at slow if using a stand mixer) and increase to medium (if using a hand mixer
).
- Mix for 8 minutes.
- Stir in desired icing colors (I use Wilton gel colors to keep full strength consistency).
- Keep bowl covered with a damp cloth to avoid drying. Color flow dries pretty fast.
- Links to:
Cookie Recipe and step-by-step instructions
Color Flow Icing Technique: How to decorate your cookies
Thinning Color Flow
Royal Icing as Color Flow: Coming Soon
Cookies: Halloween Bouquet


Cookie Recipe and step-by-step instructions
Color Flow Icing Recipe: Cookies Glaze
Color Flow Icing Technique: How to decorate your cookies
Thinning Color Flow
Royal Icing as Color Flow: Coming Soon
Cookies: Cookie Dough (Roll-Out Cookies) Recipe
 Recipe:
1 cup of butter
1 cup of sugar
1 large egg
1 tspoon vanilla
2 tspoon baking powder
3 cups flour
Directions:
- Preheat oven to 400F.
- Cream the butter and sugar in a large bowl with an electric mixer at low speed.
- Add egg and vanilla and mix.
- Add baking powder then one cup of flour. Mix at low speed.
- Add the rest of the flour one cup at a time and continue mixing.
- The cookie dough will be dry and stiff, so try mixing with the electric mixer and finish by hand (if the dough is too dry then add 1 tspoon of water and mix).
- Do not chill dough so it won't loose its freshness and consistency. It is best if this dough is used right away.
You can divide dough into 2 halfs and roll them separately.
On a floured surface roll each portion into a big circle and 1/8 in. thick. I use dowel rods on the side of the dough and under the rolling pin, to be able to tell whn to stop. The cookie dough will be as thick as the rods.
Dip cookie cutters into flour before you cut the cookies ( I recommend Comfort Grip cookie Cutter
by Wilton). Cut your cookies.Insert the cookie stick (I used Wilton Cookie Sticks on picture below) by placing your hand on top of the cookie. Wiggle the stick in half way through the cookie. Use your hand to guide the cookie stick.
**Double Click on Pictures to Enlarge**
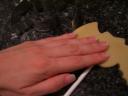
Lift the cookie with spatula. Check to see if cookie stick is showing on the other side of the cookie, if so, cover up with dough.

Bake cookies on an ungreased cookie sheet
on top rack of oven for 6-7 minutes, or until cookies are lighlty browned at the edges.
This recipe makes about 20-24 average sized cookies. For the cookies made in the Cookie Bouquet picture, it makes about 12-13 cookies.

NOTE: the cookie dough can be tinted with Wilton Icing color. Knead small amounts until desired color is reached.
CHOCOLATE COOKIES
Blend into dough 3 ounces of melted unsweetened chocolate.
LINKS
Flow Icing Recipe: Cookies Glaze
Color Flow Icing Technique: How to decorate your cookies
Thinning Color Flow
Royal Icing as Color Flow: Coming Soon
Wednesday, October 3, 2007
Buttercream: Basket-Weave Technique
Double Click to enlarge Pic

Materials
- Tip: #47
- Icing: Buttercream
- Icing Consistency: Medium
Instructions
- Prepare your cake: tort and frost with same color of icing as your basket.
- Fill prepared tip 47 icing bag with medium consistency buttercream.
- In order to create straight lines (if you are not ready to eyeball it) we have to imaginarily divide the cake in equal parts and mark the edges with a spatula.
- If you have a round cake, mark the half of the cake (or diameter) with a spatula just by touching the edge and making a small indentation.
- Divide another half across the diameter (that is, divide by quarters).
- Divide again by 8ths, then divide again by 16ths.
- I am sure you get the idea by now, so if you have a square cake or oval cake, divide it by equal parts.
- Place your spatula parallel to the side (wall) of the cake and indent a line where you marked the edge of the cake. Continue this around the cake to have 16 vertical lines (16th parts).
Using your prepared tip 47 icing bag, place the tip with serrated side pointing upwards and make one vertical line (use the vertical lines that you marked in the cake to guide you). Since this is our first line we have to make another vertical line on top of this one (2 layers) to make sure it will be in level with the rest as we progress. *Double click on pics to enlarge*
- Make a horizontal icing line across the vertical icing line (to make a letter T) using the width of your previous marked line until the next marked line (that is, cover two parts).
- Use your tip 47 and pipe a small piece of icing to mark the width of spacing between horizontal lines as shown above (always mark spacing with your tip or you will end up with a loose basket).
- Create your second horizontal line parallel to the top vertical line. Repeat until you finish covering your vertical line.
- Make another vertical line (one layer from now on) on the secong imaginary line, now covered by the ends of your horizontal line and space markers.
- Insert tip gently under previous vertical line (as shown in picture below) and create a horizontal line across second vertical line (tip: do not touch vertical line when piping, simply lift icing upwards and let it fall over vertical line - this will prevent the icing from sinking)
- Repeat process. (step 7-8)
- I am sure you get the idea now, repeat the process until you have completed the 16 divided parts of the cake.


Practice with an upright board if you want to get a more realistic feel

Variations
I like the serrated side of the tip as it gives the basket weave some texture. You can use the flat side of the tip to create a different texture for your basket (see picture below).

You can use a round tip (tip 7) to create the vertical lines and the serrated tip 47 to create the horizontal lines. This creates a wonderful basket as well.
Monday, October 1, 2007
Basket-Weave Cake
In order to increase my knowledge in cake decorating I took a class to learn new techniques. I learnt in this class to create beautiful Royal icing flowers and basket-weave the cake with buttercream.
I would like to share with you the buttercream basketweave and rope border decorations that I used in this cake as well as these beautiful royal icing flowers.


Royal Icing Recipe
Buttercream Icing Recipe
Basket-Weave technique (step-by-step instructions)
Royal Icing Flower Index
Coming Soon:
Royal Icing Flower Index with step-by-step instructions
Rope Border
About this cake: Chocolate, cinnamon and banana cake filled with 'dulce de leche'. Basket weave and rope borders made with buttercream icing. Flowers with royal icing: apple blossoms, daisies, victorian roses, daffodils, mums and violets.
Royal Icing Recipe
By popular demand, here is the Royal Icing recipe by Wilton.
Stiff Consistency (Yields 3 cups)
Ingredients:
3 level tablespoons of Meringue Powder
1 lb. sifted pure cane confectioners' sugar
5-6 tablespoons lukewarm water
**Make sure all your utensils are grease free. Tip: boil egg beaters to remove grease.**
- Place confectioners sugar on a large bowl and add the meringue powder. Mix at low speed until blended.
- Add water and mix for about 8 minutes at low-medium speed until the icing looses its sheen (if you have been mixing for 8 minutes and the icing still has some sheen, don't worry about it, your icing is done).
- To prevent drying cover the bowl of icing with a damp cloth while you are working with it.
Stiff, Medium or Thin Consistency:
Stiff consistency- See recipe above
Medium consistency- Add a teaspoon of water per cup of icing above
Thin consistency- Add two teaspoons of water per each cup of stiff consistency. One teaspoon of water or milk per each cup of medium consistency icing.
To read more about icing cosistency, read buttercream consistency here which applies to Royal Icing.
Store in airtight container for up to two weeks. If you want to use it after a while, notice the the icing top layer has dried a little bit. Just mix in low speed to restore original texture. Sometimes you might need to add some water.